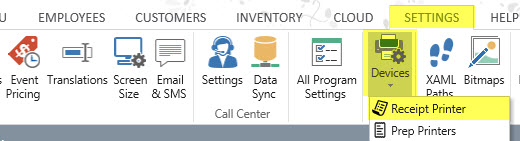
In back office, navigate to Back Office | Settings | Devices and select Receipt Printer from the drop-down list.
Settings are organized as follows:
Local Settings (must be set at each pos station)
Select the printer name from the drop-down list, select the appropriate printer type and click the Test Receipt button to confirm that the printer is installed correctly. AmigoPOS can automatically print additional copies if required. Set the value of Print Copies to the number of copies required. Set to No Copies to print only one receipt. This value must be configured on each pos station independently.

Receipt Printer Configuration
- Enable This Device*: Set to Yes to enable the receipt printer at the local pos station
- Printer Name*: Select the Windows printer name from the drop-down list
- Printer Type*: Select Epson® (ESC/POS) or Star® mode emulation
- Print Copies*: Select the number of copies to print (in addition to the original customer receipt)
- 2nd Receipt Printer Enabled*: Set to Yes to print a duplicate customer receipt to a second receipt printer. The printer must be the same type, i.e. Epson (ESC/POS) or Star, as the primary receipt printer. Cash drawers connected to the second receipt printer are not supported.
- Characters Per line*: For non-standard printers, specify the number of characters per line (default is 41)
Most receipt text can be customized by changing the text values under the Custom Text heading. Note that most phrases should be kept short so that the receipt prints properly.

Custom Text Settings
- Receipt Number: Text to print on customer receipt next to ticket number at the bottom of the ticket (visible only when a barcode is not printed)
- Delivery Charge Text: Text to print on customer receipt for delivery charge
- Print Guest Prefix: When ticket details are grouped by guest, print this before the guest number, for example the red text in the phrase -- Guest 1 --
- Print Guest Suffix: When ticket details are grouped by guest, print this after the guest number, for example the red text in the phrase -- Guest 1 --
- Amount Tendered: Text to print on customer receipt for amount tendered
- Bottom Line 1: Text to print on customer receipt if bottom line 1 is enabled
- Bottom Line 2: Text to print on customer receipt if bottom line 2 is enabled
- Bottom Line 3: Text to print on customer receipt if bottom line 3 is enabled
- Bottom Line 4: Text to print on customer receipt if bottom line 4 is enabled
- Bottom Line 5: Text to print on customer receipt if bottom line 5 is enabled
- Change Due: Text to print on customer receipt for change due
- Customer Copy: Text to print on customer receipt when indicating that the receipt is a customer copy
- Customer Information: Text to print on customer receipt above the customer name and address
- Foreign Currency: Text to print on customer receipt above foreign currency conversion
- Guest: Text to print on customer receipt when displaying the number of guests on the customer receipt (1 Guest)
- Guests: Text to print on customer receipt when displaying the table number on the customer receipt (more than 1 Guest)
- Item Count: Text to print on customer receipt for total number of items
- Mandatory Gratuity: Text to print on customer receipt when a mandatory gratuity is added to a ticket
- Order Number: Text to print on customer receipt above the large order number at the bottom of the ticket
- Pay This Amount: Text to print on customer receipt for amount to pay
- Seat: Text to print on customer receipt for seat
- Server: Text to print on customer receipt for server
- Split: Text to print above total on split tickets
- Subtotal: Text to print on customer receipt for subtotal
- Table: Text to print on customer receipt when displaying the table number on the customer receipt
- Top Line 1: Text to print on customer receipt if top line 1 is enabled
- Top Line 2: Text to print on customer receipt if top line 2 is enabled
- Top Line 3: Text to print on customer receipt if top line 3 is enabled
- Top Line 4: Text to print on customer receipt if top line 4 is enabled
- Top Line 5: Text to print on customer receipt if top line 5 is enabled
- Total Due: Text to print on customer receipt for total due (total due appears instread of amount to pay if the ticket is already settled)
- Transactions: Text to print on customer receipt for transactions header
Up to five suggested gratuities can print automatically at the bottom of the customer receipt by enabling each gratuity and setting a value greater than zero.

Suggested Gratuities
- Suggested Gratuities: Text to print on customer receipt for suggested gratuities header
- Suggested Gratuity: Text to print before the suggested gratuity amount, for example % TIP =.
- Print Suggested Gratuity Value (1-5): Whole number percentage value of suggested gratuity. Set to zero to disable.
- Print Suggested Gratuities: Enable suggested gratuities at the bottom of the customer receipt
Additional formatting is possibly by changing the settings under the Receipt Settings heading. Many setting names are short and may not be self explanatory; click on the setting to view a brief explanation of the setting at the bottom of the screen.

Additional Receipt Settings
- Auto Settle Fractional Balance: Set to Yes to automatically settle orders with a balance less than .01.
- Auto Settle Orders With No Transactions: Set to No to prevent zero balance orders from automatically settling if no order transactions exist
- Combine Order Items: Set to Yes to show reorders for the same item on a single receipt line. This feature is useful for bars to reduce the size of the customer receipt and reduces the time required to recall an order.
- Print Space Between Order Items: Print a blank line between items on customer receipt
- Print After Void: Set to Yes to automatically print customer receipt after voiding it
- Print Bar Tab Name: Print bar tab name on customer receipt for receipts printed after initial bar tab order is submitted
- Print Bitmap Logo: Print the stored bitmap image on the customer receipt
- Print Bottom Barcode: Print scannable Code 39 barcode at the bottom of the customer receipt
- Print Bottom Line (1-5): Print additional text at the bottom 5 lines of the customer receipt
- Print Bottom Time: Print time on bottom of receipt
- Print Header: Print server name, order type, table at the top of the customer receipt
- Print Subtotal: Print the subtotal on the customer receipt
- Print Top Line (1-5): Print additional text at the top 5 lines of the customer receipt
- Print Transactions: Print all transactions at the bottom of the customer receipt
- Print Zero Cost Modifiers: Print zero-cost modifiers under menu items on the customer receipt
- Print Line Below Logo: Print a line under the ticket logo or at top of ticket if no logo is used. Set to 0 for no line 1 for single line 2 for double line
- Print Line Below Top Text: Print a line under the top 5 ticket text lines. Set to 0 for no line 1 for single line 2 for double line
- Print Line Below Header: Print a line under the header. Set to 0 for no line 1 for single line 2 for double line
- Print Line Above Total: Print a line above the ticket total. Set to 0 for no line 1 for single line 2 for double line
- Print Line Below Total: Print a line under the ticket total. Set to 0 for no line 1 for single line 2 for double line
- Print Line Above Bottom Text: Print a line above the bottom 5 ticket text lines. Set to 0 for no line 1 for single line 2 for double line
- Print Line Below Bottom Text: Print a line under the bottom 5 ticket text lines. Set to 0 for no line 1 for single line 2 for double line
- Round Order Total: Enter a whole number to round the order total to the nearest amount. For example, to round an order to the nearest nickel, set the value to 5 so that 1.12 is rounded to 1.10 and 2.18 is rounded to 2.20. AmigoPOS will automatically calculate the difference required in the subtotal amount to round up or down. Only the subtotal is adjusted; the tax total remains the same and the order total is rounded to the correct amount.
Some customer receipt settings can be restricted to selected order types. Navigate to the order types editor and select the order type from the drop-down list to view the available settings.

Order Type Settings
- Print Order Type On Top: If the box is checked, the order type will be printed in block letters at the top of the order.
- Print Order Type On Bottom: If the box is checked, the order type will be printed in block letters at the bottom of the order.
- Print 3-Digit Order Number At Bottom: Set to Yes to print a large 3-digit order number at the bottom of the prep ticket and customer receipt. For example, Order Number 12345 will appear as ORDER 345. This setting applies to both the customer receipt and prep ticket.
- Print Ticket Item Count: Set to True to print the total number of items (excluding optionals) at the bottom of the order
- Auto Print Receipt: Automatically print receipt each time a transaction is completed on an order started with this order type