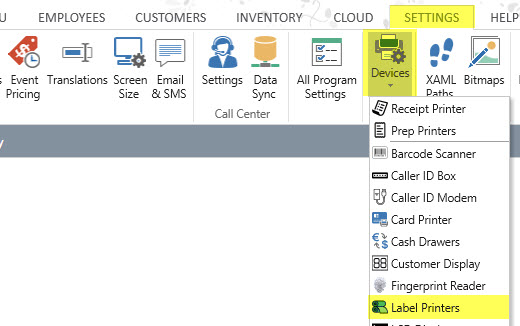
AmigoPOS includes support for up to 5 label printers and supports most modern label printers that use MS Windows printer drivers. The printers should be installed using network print servers similar to the prep printer setup description. Each printer can be configured in Back Office | Settings | Devices.
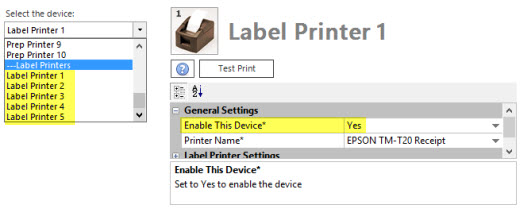
Select Yes next to Enable this device and enter the local printer name. Select the label printer from the Printer Name drop-down list and click the Test Print button to verify that AmigoPOS can communicate with the label printer. Note that this step must be completed at each pos station. The following settings are shared by all stations and can be set at any station or back office PC:
Label Printer Font: Select a fixed width font for best results
Label Template: Refer to the templates section below
Label Printer Font Size: Select a font size based on the label size and the information that will be printed on the label. For example, if the customer's address is included on each label, choose a smaller font size to ensure that more than one label is not required
Label Print Modifiers: Check the box to print the modifiers under each menu item
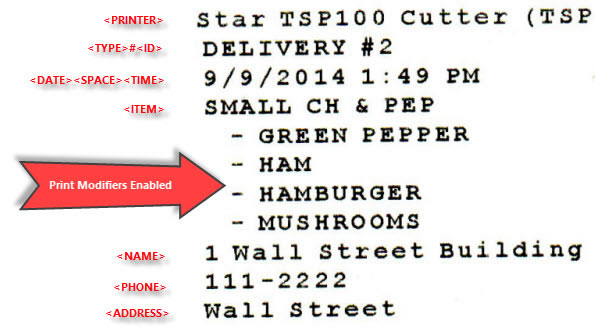
The label template is used to customize the information that is printed on each label. Tokens are used to specify the information to be printed and other information can be included in plain text, i.e. the business name, address, or phone number can be added to the template. The example shown above uses the template:
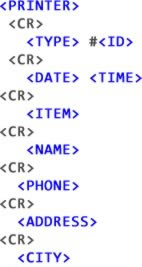
The following tokens are available:
<CR | Line break (carriage return)
<SPACE | Empty space
<ID | Order Number
<DATE | Date that the label was printed
<TIME | Time that the label was printed
<ITEM | Menu Items
<NAME | Customer's full name
<PHONE | Customer's phone number (formatted as per back office settings)
<ADDRESS | Customer's street address
<CITY | Customer's city
<TYPE | Order type
<PRINTER | Printer name
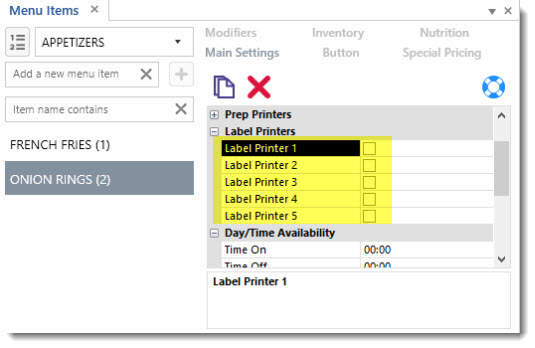
Each regular menu and bar menu item can be sent to any or all label printers by checking the box next to the Label Printer (1-5) fields.

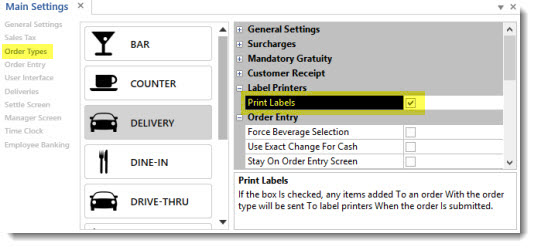
In Back Office | Settings | Main Settings | Order Types, select each order type that requires labels and check the box next to the Print Labels field.
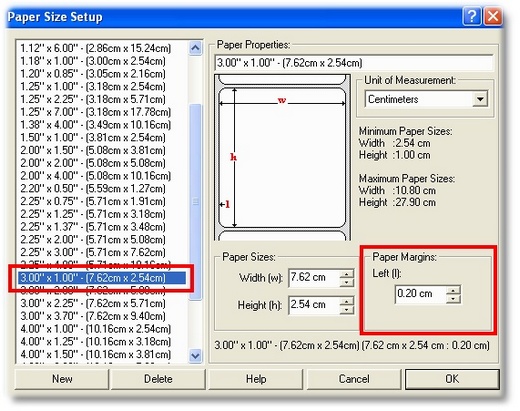
After the printer is installed, open Windows Control Panel | Devices and Printers, right-click on the label printer and verify that the correct label size is selected. The driver for the Zebra label printer below also allows the left margin to be reduced.
