The Epson TM-T20 USB printer requires a slightly different installation procedure with a different driver than the TM-T88. Complete the steps below to install a new TM-T88II receipt printer. Do not connect the power to the printer or attach the USB cable until prompted to do so in step 7. Steps 9-16 describe the process to upload a bitmap logo to the printer and to set the key-code non use mode.
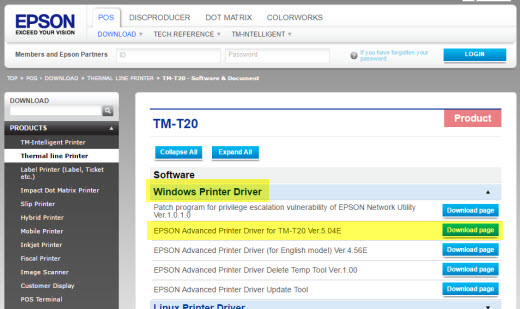
1. Download and run the installer from https://download.epson-biz.com/modules/pos/index.php?page=prod&pcat=3&pid=37
2. Click Install Now.

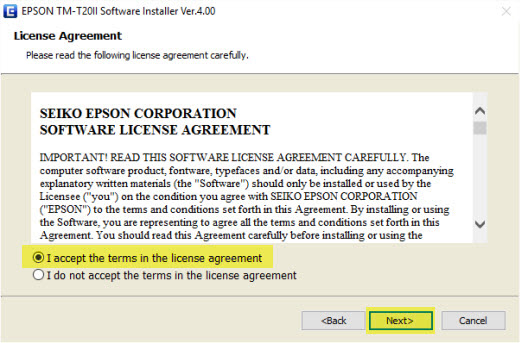
3. Read & accept the license agreement and click Next to continue.
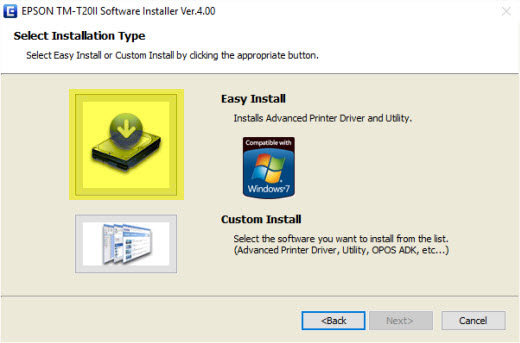
4. Select Easy Install.
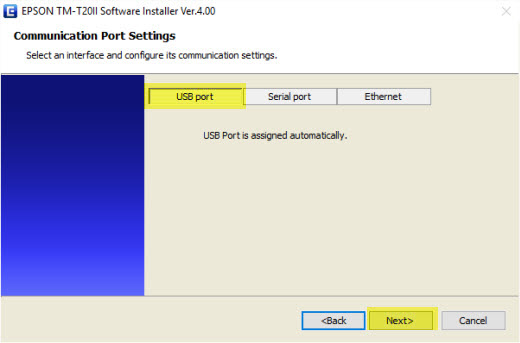
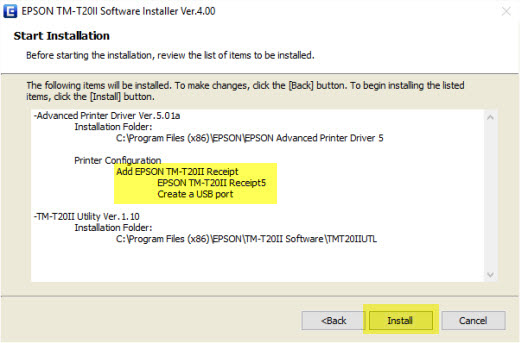
5. Verify that USB port is selected and click Next to continue.
6. Click Install to Install the driver.
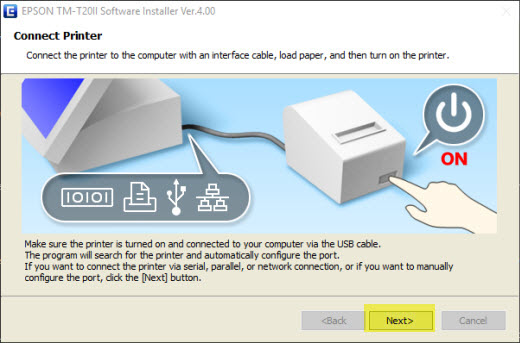
7. Connect the power supply and attach the USB cable. Click Next and Windows will automatically detect and install the printer.
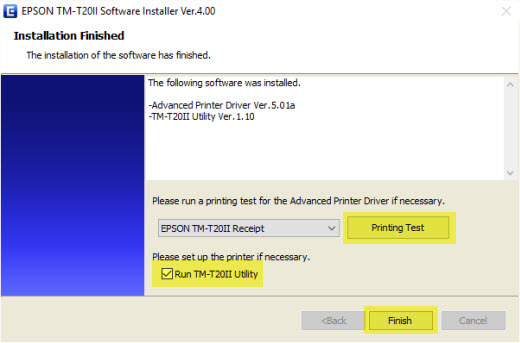
8. Click Printing Test to verify that the installation is successful, check the box to run the TM-T20II Utility if a printer logo is required and click Finish.
Skip steps 9-16 if a printer logo is not required.
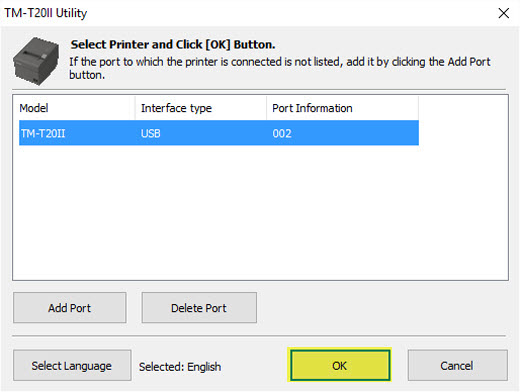
9. Verify that the correct language is selected and click OK.
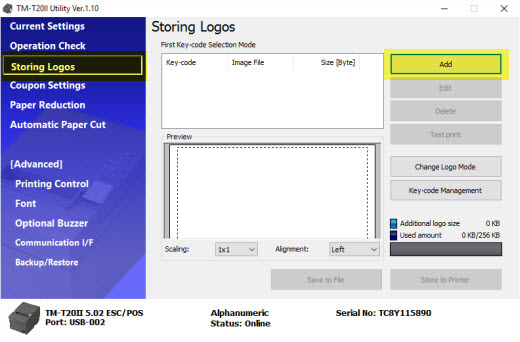
10. Select Storing Logos at the left and click Add to open the file chooser. Select the logo file.
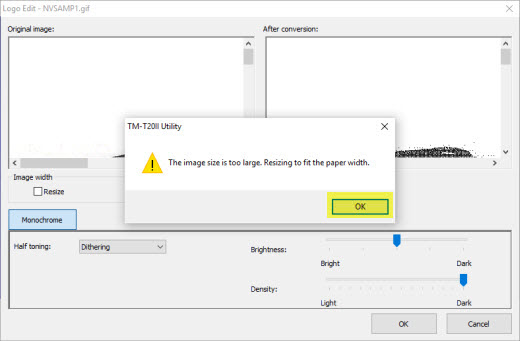
11. The logo is automatically opened in the editor so that the size and color settings can be adjusted, if necessary.
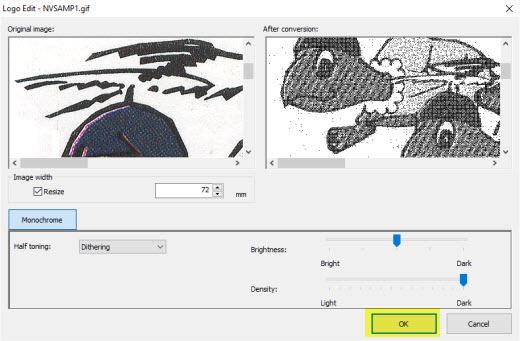
12. Verify that the logo is properly sized in the After conversion window and click OK.
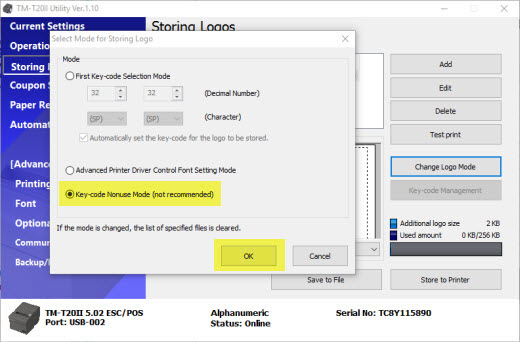
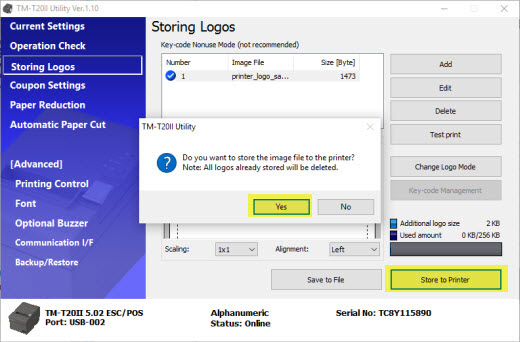
13. Click Change Logo Mode, select Key-code Nonuse Mode and click OK.
14. Click Store to Printer and Yes to confirm to upload the logo to the printer.
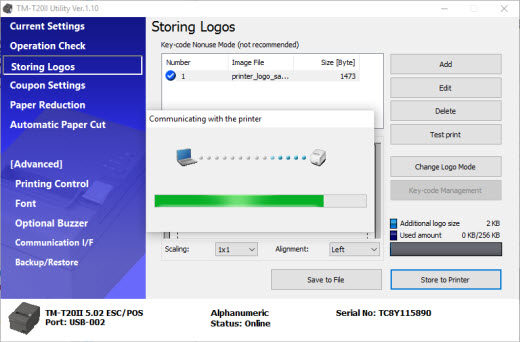
15. Uploading the logo to the printer's memory may take up to a minute depending on the logo size.
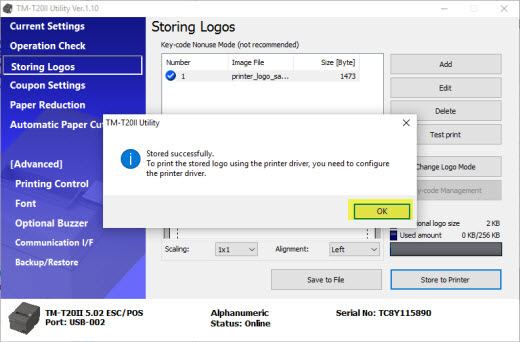
16. A message appears confirming that the logo has been uploaded successfully.
17. Open Back Office | Settings | Devices | Receipt Printer, select the TM-T20II Receipt printer from the drop-down list, set the printer type to Epson (ESC/POS) and print a test receipt to verify that the receipt is printed correctly.

Back Office | Settings | Devices

Receipt Printer Configuration